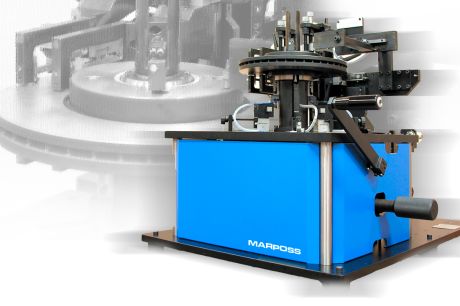
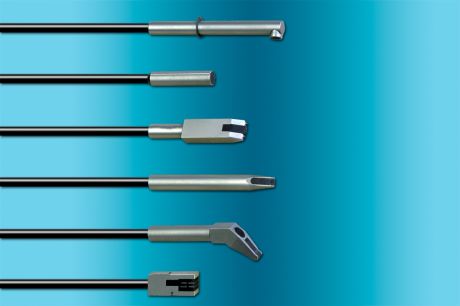
Electronic for Quality Inspection by Eddy Current
E70S - E59N
E70S and E59N are eddy current systems designed to verify both surface quality, as well as, material characteristics using contactless eddy current probes. Non-destructive tests (NDT) by means of eddy current (ET) are used to check for superficial defects like cracks, pores, or blow-holes. This is done to verify the accuracy of the heat treatment and to monitor material mix; without damaging or contaminating the tested samples.
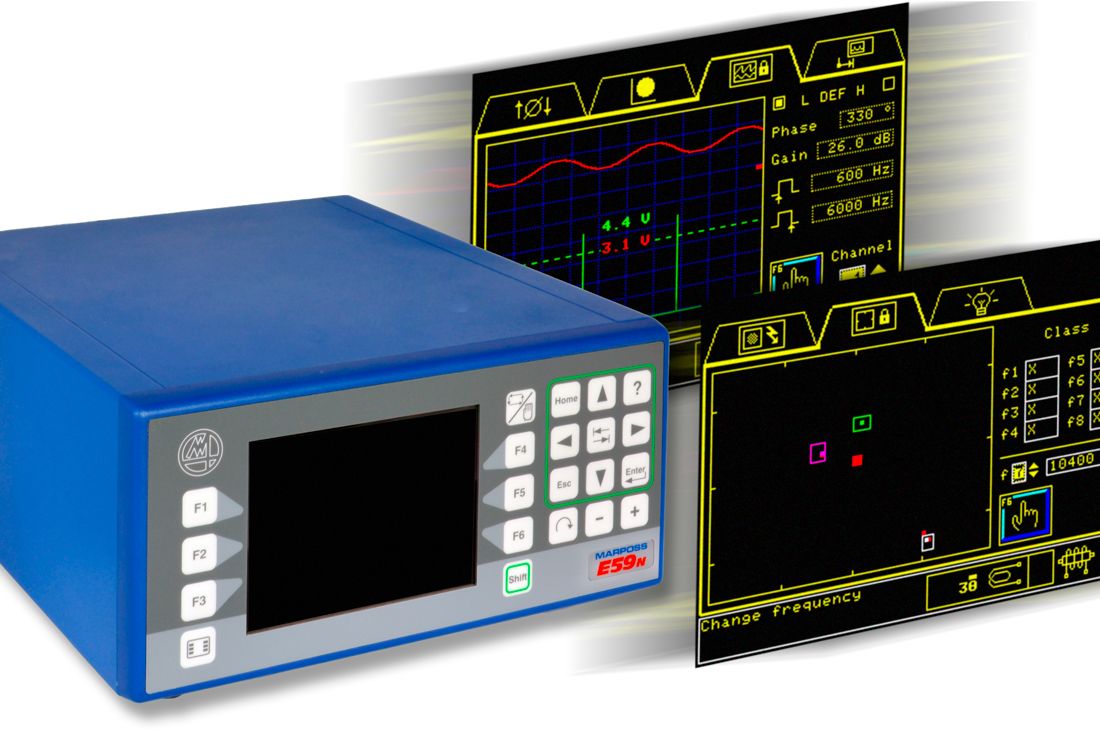
Marposs NDT electronics E70S and E59N are based on the working principle of eddy current this technique generates onto the specimen under test, the so called “eddy current”; that are small loops of electric current induced by a time varying magnetic field.
The presence of superficial defects or differences on the material composition, will change the normal behavior of the eddy current. These changes are detected by eddy current electronics E70S and E59N to sort good from bad parts.
A magnetic field is generated by an eddy current probe, properly designed to fit applicative problems. The strength of the magnetic field is enough to detect superficial defects, or material deviations with no risk of leaving residual magnetization on the part tested; so that it can complete its production process.
E70S and E59N electronics can be used as part of Marposs’ turnkey applications, or as components to be integrated into customer applications.
In case of doubtful applicative problems, Marposs can examine the feasibility of the check by making tests on parts supplied by the customer, suggesting the proper combination of sensors and electronics.
Machining processes such as turning, grinding, drilling, thermal treatments, or casting may generate defects that need to be detected in order to avoid the breakdown of mechanical components; if undetected these components could compromise the users’ safety. Quality assurance of every part produced, proves that having reliable technology to inspect 100% of produced parts, at typical production line rates, is crucial.
Non-destructive tests (NDT) based on eddy current, allow testing the properties of the materials without the need of part preparation such as deep cleaning or degreasing. E70S and E59N, in combination with properly designed eddy current sensors, provide a shop floor solution for automatic inspection systems of mass production components to check:
- material integrity to detect superficial defects such as cracks, porosity, blow holes, etc.;
- material properties to verify superficial hardness and case depth;
- material identification to avoid material mix of part having same geometry but made with different materials.
Thanks to the following advantages of eddy current technology:
- part preparation is not need
- there is no contact between eddy current probe and inspected part
- possibilities to use both fixed and scanning probes
A test speed higher than any other NDT techniques is possible, which makes it useful for carrying out the checks automatically on 100% of the production, as a final inspection.
From the simplest screw to the most complex crankshaft, with tailor made automatic solutions and more than 350 eddy current probes in portfolio, every specific inspection problem can be solved.
- 1 to 12 test channels
- working frequency programmable within a range from 10Hz to 10MHz
- DSP processor for signal analysis
- number of parameter sets in memory: up to 256
- part to probe distance compensation for defect detection
- multifrequency mode (up to 8) for material property inspection
- auto setting function
- guided menus
- high definition color display
- graphic LCD 320x240 pxls, ¼ VGA
- local or remote operator panel
- stand alone or panel mounting configuration available
- 24 Vdc (-15/+20) % power supply
- power consumption 8 A (max)
- I/O connection: profibus, profinet or optoinsulated I/O
- BCD/Binary: 32 (16 out, 8 in,8 in/out programmable)
- high speed dedicated I/O
E59N
Eddy Current electronic, suitable for small automatic applications or benches, manages up to 4 channels with the following configurations:
- up to 4 channels for defect inspection (max 8 probes with internal multiplexer function)
- up to 4 channels for hardness inspection
- 2 channels for defect inspection + 2 channel for hardness inspection
E70S
Eddy Current electronic, suitable for complex automatic application or benches, manages up to 12 channels with the following configurations:
- up to 12 channels for defect inspection (max 24 probes with internal multiplexer function)
- up to 12 channels for hardness inspection
- a combination of defect and hardness inspection according to the application needs
CRANKSHAFT
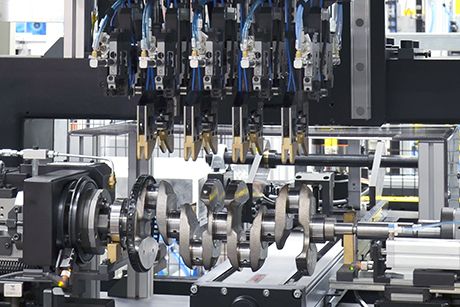
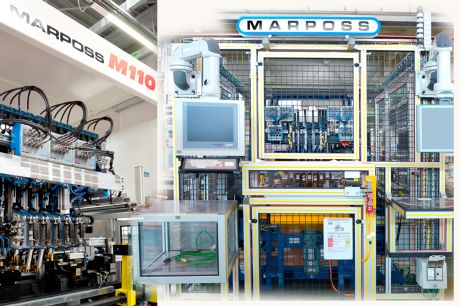
M110 machine for cracks and porosity test on crankshaft
3 E70S electronic unit are connected to 30 ND sensors to check the five main bearings, four pin bearings, and the flange of the crankshaft.
CAMSHAFT
Internal combustion motors, compressors and pumps are just some of the many components that use shafts with eccentric cams designed to move other mechanical components. The production processes of these parts, as well as the heat treatments and the subsequent mechanical machining processes, can lead to the formation of surface defects, such as:
- Porosity
- Cracks caused by heat treatments
- Cracks caused by mechanical machining, such as for example, turning and grinding
- Cavities and missing material caused by casting shrinkage
The presence of the aforementioned defects can lead to the failure of the camshaft under stress, compromising the correct operation of the finished product. Therefore the surface quality of the eccentric must be checked during the production process of the single camshaft or single cam.
The complex geometry of cams traditionally required the use of testing procedures consisting of either a manual inspection (subject to the bias of an operator) or testing with technologies which are difficult to automate, such as penetrating liquids and/or magnetic powder, that require a complicated management of the part cycle in terms of cleaning.
The solution designed by Marposs uses eddy currents that, thanks to a particular design of the sensors, allow the inspection of the surfaces concerned to be performed directly on the production lines for 100% inspection.
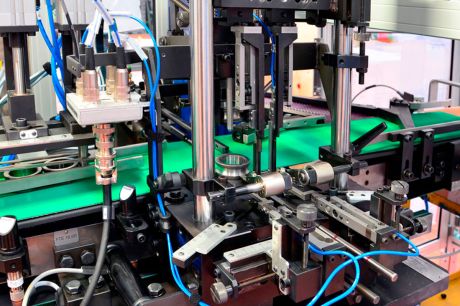
The uniqueness of the Marposs probes lies in the presence of small diamonds set in the body of the sensors that allow the probes, mounted on mechanical followers, to maintain the correct operating distance from the part, following the profile to identify cracks and porosity.
The particular shape of the diamonds and the contact force with which the sensors are pressed on the surface of the parts being tested, guarantees the correct mechanical positioning without damaging the surface being inspected.
The inspection consists of scanning the whole surface with a rotary movement of the cam and a translational movement of the sensors in order to check, with a sufficiently compact spiral, all the useful surface of the eccentric.
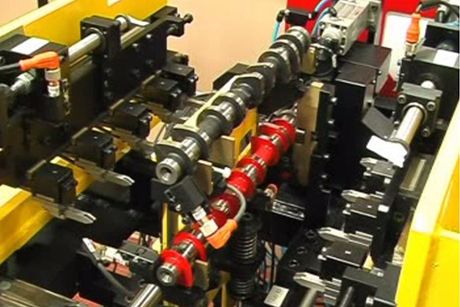
M110 machine for cracks and porosity test on camshaft
Two E70s are connected to 16 ND sensors for the simultaneous checking of ten lobes and six journals of the camshaft. The sensors scan the entire surface of the shaft.
CYLINDER BORE
The manufacturing processes of motor crankcases can lead to the formation of defects inside the cylinder bores, such as porosity (resulting from fusion issues in cast iron or aluminium crankcases) and cracks (following problems in the assembly of steel bores in mainly aluminium crankcases).
The presence of such defects compromises both the reliability of the motor and its performance in terms of pollution. Excess oil sitting in the surface porosity increases the polluting emissions in the atmosphere, rendering the motor non-compliant with emission standards. Identifying the surface defects is therefore of fundamental importance to eliminate non-complying components from the production cycle.
These types of defects can be identified with eddy current technology and a rotary plug designed specifically by Marposs to inspect the inside surface of the cylinder bores.
The N.D. plug is fitted with two eddy current probes (opposite each other) that rotate at a speed between 1000 and 3000 RPM, based on the cycle time of the line.
The plug is available in two versions:
- Only N.D. test with the possibility of up to three different diameter sections
- Integrated N.D. test with pneumatic dimensional test
The integrated N.D. and dimensional solution allows for the complete test of the cylinder bore in terms of quality (presence of surface defects) and geometry, controlling diameter, ovality and taper with two pneumatic measuring sections at right angles X-Y.
The integrated solution provides clear advantages by reducing the testing times, size and costs of the application.
The applications can be completely integrated in production lines, completing the inspection of the crankcase, by adding to the plugs for the cylinder bores, a plug for inspecting the motor shaft axis. The resulting final crankcase inspection machine integrates N.D. and dimensional tests.
Based on the production rate of the line the machine will be designed with one or more plugs to test all the crankcase cylinders in steps or simultaneously.
The mechanical structure of the application features plugs fitted to floating and recoiling systems that guarantee the perfect insertion in the cylinder bores, even if there are small misalignments in the crankcase.
The system has also been developed to map the position of the individual defect inside the cylinder bore in order to define areas with different sensitivity, such as for example the combustion chamber (where small defects need to be identified) or the sliding surf
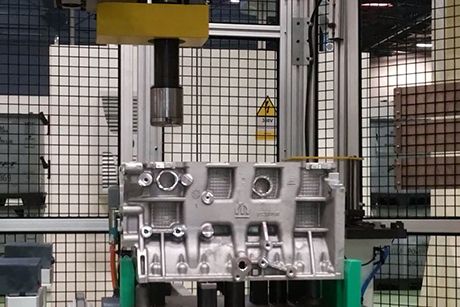
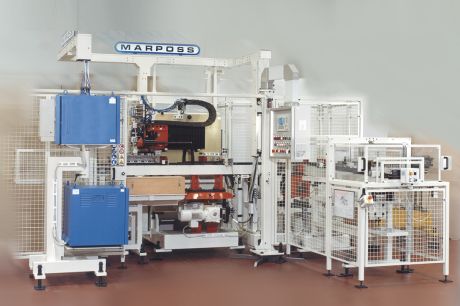
M125 machine for porosity test and dimensional inspection in the engine block cylinder bores
The E70s electronic unit is connected to the ND sensors mounted on the rotating plug for the porosity test of the four-cylinder bores. Scanning time for the whole inner surface of a single bore is 4-5 seconds. The plug is also equipped with air nozzles for the dimensional inspection of the cylinder bore. The diameter size is displayed on the E9066 electronic unit.
HUB
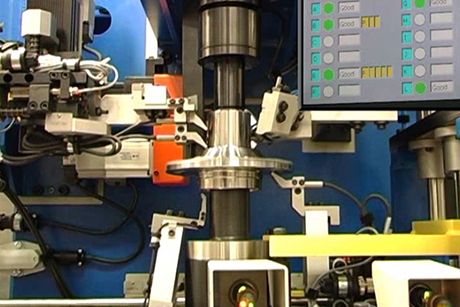
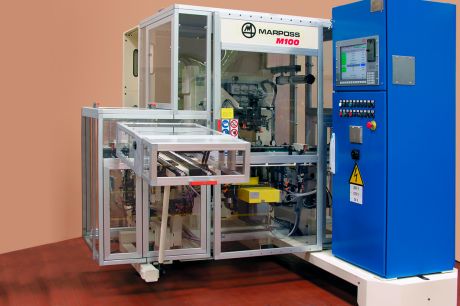
M100 machine for cracks and porosity test on hub
The E70s electronic unit is connected to 10 ND sensors that simultaneously scan the whole part surface for crack and porosity test.
BRAKE DISK
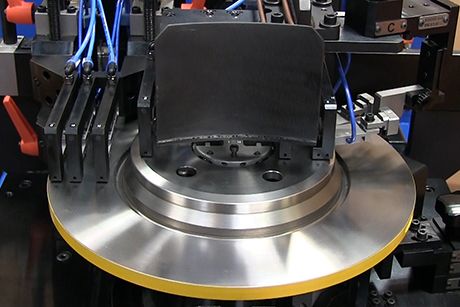
M50 bench for cracks and porosity test on hub
The E70s electronic unit is connected to 12 ND sensors that simultaneously scan the whole part surface for crack and porosity test.
PISTON PIN / SHAFTS
The need to perform Non Destructive tests with eddy currents on 100% of the production of parts with a cylindrical geometry, such as, pins, shock absorber rods, rollers for bearings, etc., have led to the development of Marposs' rotating probe system.
The rotating probe allows the identification of surface defects on the external shell of parts tested with two eddy current probes opposite each other.
The contact-less signal transmission system eliminates the problem of sliding contacts and the subsequent need for system maintenance.
The eddy current probes rotate at high speeds (up to 3000 RPM) around the part being inspected, scanning the entire surface with a helical movement that guarantees the 100% test of the external shell. Any changes of the probe-part distance are not an issue thanks to the automatic distance compensation function.
The typical defects of the parts checked are porosity, cracks and missing material caused by the production process, mechanical machining and the heat treatments.
The rotation speed of the probe can be adapted to the production requirements to inspect parts on production lines with part transfer speeds up to a maximum of 6m/min. The inspection range of the diameter currently changes from a minimum of 4 to a maximum of 70 mm. The length of the part is virtually unlimited.
Thanks to a unique processing software of the eddy current probe signal (AED Automatic Edge Detection) the system is able to automatically detect the start and end of the part, enabling and disabling the measurement without the need for any additional external sensors. The processing can also be suspended, if the part has grooves which must be excluded from the inspection.
The Marposs E59N or E70S electronic units can independently manage the queue of the parts produced with the integrated shift-register logic, operating correctly a rejects segregation system in the line or by supplying the information to the machine logic.
The system can be installed directly downstream of the last grinding operation as a stand-alone unit and integrated directly on the existing conveyor, rendering the inspection station extremely compact and easy to maintain.
The rotating probe system can be integrated with the following options:
- a rejected parts ejection unit
- an inspection system for the correct heat treatment with a ring sensor
- a demagnetisation system before the N.D. test
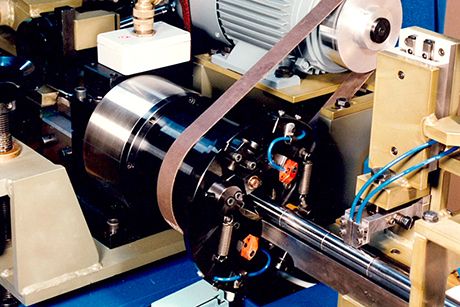
The equipment has been designed with the aim to solve the problem of the 100% piston pins /shafts inspection as close as possible to the production line without need of particular workpiece handling in order to keep space and cost as low as possible.
N.D. CONTROL ON CENTERLESS GRINDING
The ever-increasing demand for a quality control that covers 100% of the production, requires flexible technical solutions that can guarantee the maximum performance possible with reasonable costs.
Surface defects can be identified on the outside shell, of cylindrical mechanical parts such as pins, pistons for braking systems, stems of gas shock absorbers, cylindrical bars, steering rods, plugs, and more. This is done in an original and safe way by integrating the ND control directly on the Centerless grinder and performing the test during the machining cycle.
Using the mechanical stability of the part, guaranteed by the grinding operations, and the fact that they are rotated and moved by the grinding. The ND control can be performed alongside the mechanical machining. This is done without the need for additional stations in the existing production line and thus, optimizing the control times.
Marposs has developed ND sensors with eddy current technology in different shapes and sizes that can be fitted directly in the mechanical reference that guides the parts during their transit inside the grinding process.

The materials and technologies used for the eddy current sensors are integrated in the sensors, this guarantees their complete impermeability so that they can withstand the harshest environments. They can also be used to detect surface defects on the shell such as, microcracks, porosity and blow holes.
Special SW functions are designed specifically for controls on centerless grinding machines. The electronic equipment is able to automatically enable and disable the measurement during the passage of the parts, without additional external sensors, such as inductive or mechanical micros.
The eddy current probe identifies the start of the part independently, so that the ND control can be enabled a few millimeters from the part's edge. This is done while being maintained to the opposite end of the part.
The SW specifications also allow the automatic exclusion for sections of the surface that are not involved from a functional point of view and that can tolerate surface defects.
The parametrization of the control cycle, ensures that the control system can be easily adapted to part changes even with the presence of grooves, whether axial, or crossways.
The system is able to manage a queue of parts produced. If a part is found to be faulty, the electronic unit saves the information. Then through the integrated logic, transfers the part to the station where a mechanical ejection device will push the scrap part out of the line.
CAM LOBES NDT
CYLINDER BORES NDT
BROCHURES AND MANUALS
| Brochure | |
|---|---|
| English |
E59N: (236.14kB)
E70S: (221.17kB) |
| Italian |
E59N: (310.87kB)
E70S: (374.82kB) |
| German |
E70S: (228.39kB)
E59N: (315.03kB) |
| French |
E70S: (230.53kB)
E59N: (273.10kB) |
| Czech |
E59N: (319.05kB)
E70S: (400.85kB) |
| Japanese |
E59N: (587.31kB)
E70S: (666.52kB) |
