Crankshaft Measurement Gauge on Grinder
FENAR™ L
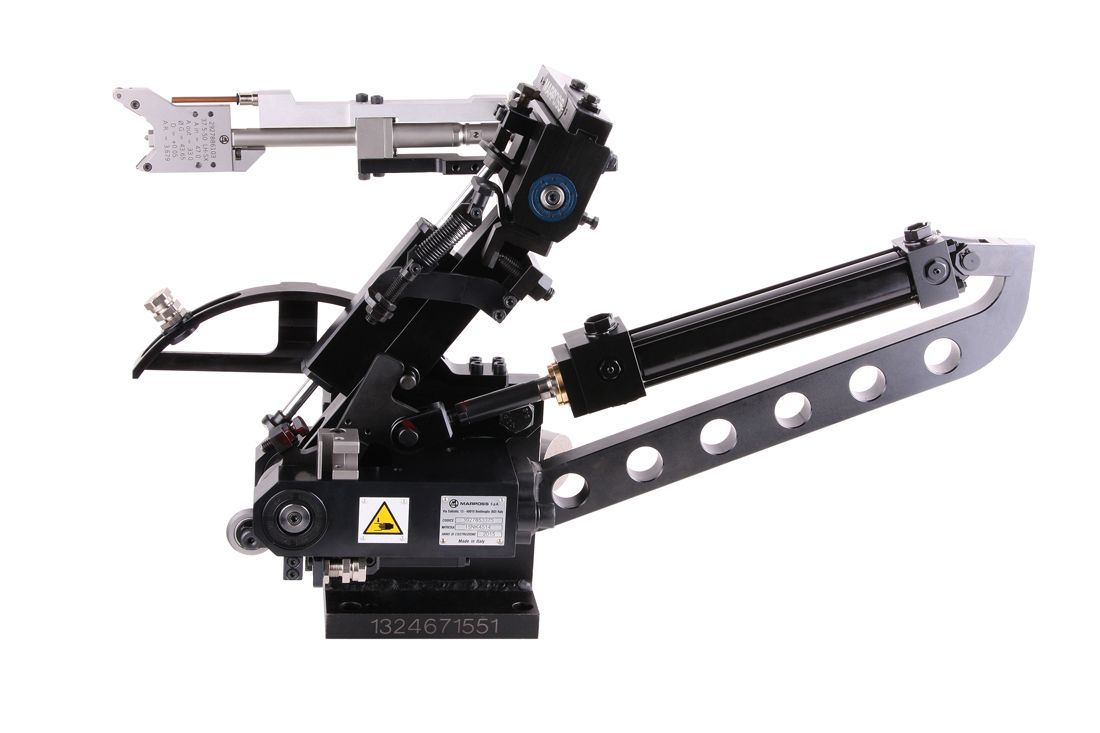
Marposs is always committed to developing technological designs to increase the efficiency of automatic machines and the quality of the production processes in which they are used, establishing a reputation as a reliable, competent partner for all your metrological requirements. In the field of crankshaft inspection, the Fenar L system is ideal for measuring main and pin journal diameters. Its mechanical configuration was designed so it is possible to monitor the value of the diameter being processed, irrespective of whether the part is rotating about the geometrical axis of the main journals or the orbital trajectory of the pin bearing journals around the main axis of rotation, using the same gauge. This solution enables modern crankshaft grinding machines to achieve the levels of flexibility and precision that make all the difference in today’s market.

FenarL, designed to mount directly on the grinding machine wheel carriages, is equipped with a gauge that, during the measurement phase, is in direct contact with the work piece. The diameter measurement information is supplied in real time to the grinding machine, which is capable of managing the machining cycle until the desired part measurement value is achieved.
What does the FenarL system offer?
- Automatic measurement cycle: the measurement head is inserted automatically onto the part diameter while it is being machined, without interrupting the grinding process
- Maximum measurement flexibility: Due to the flexibility of the measurement heads, it is possible to process a wide variety of main journal and pin bearing diameters (up to 25 mm)
- Maximum wear compensation flexibility: FenarL can compensate for up to 10 mm of grinding wheel wear on the diameter, without the need for manual retooling
- Simple retooling: FenarL can be retooled in a few, short steps when it is necessary to modify the diameter measurement range
- Maximum safety: the simple control system and dedicated, built-in safety devices prevent collisions with the crankshaft, grinding wheel and other parts of the machine tool
- Maximum processing speed: the in-process measurement is sampled at 0.5 msec intervals, which means that measurement processing speed is compatible with the cutting speed, even during the initial roughing phase. In addition, due to the processing and filtering functions it is also able to predict the value of the part through adaptive cycles
- Maximum durability: Due to the gauge seal rating, it is suitable for use in machining conditions that involve the presence of large volumes of coolant at high pressures. The device has been manufactured using materials that minimise the effects of the thermal variations caused by the coolant and/or interruptions in the machining process
- Maximum reliability: The design solutions and choice of materials are the result of many years of experience in the sector, and the hundreds of operating applications present on the market bear testament to the R&M project calculations, providing an MCBF in excess of 3 million cycles
- Roundness check (optional): when using FenarL type gauges it is also possible to check the roundness of the resulting diameter upon completion of the machining process. This option enables users to monitor how the shape of the machined part evolves in real time, and implement the necessary corrections while the process is still in progress, thus avoiding the need to carry out manual checks in the metrology lab (increased productivity)
- Increased production quality (reduced rejects)
- High precision measurement
- Flexibility
- Highly reliable and robust
- Ease of retooling
- Grinding wheel compensation (increased productivity)
For all technical characteristics, please refer to the table in the DOWNLOAD section
BROCHURES AND MANUALS
| Brochure | |
|---|---|
| English |
FENAR L: (425.97kB)
|
| Italian |
FENAR L: (429.31kB)
|
| German |
FENAR L: (430.82kB)
|
| French |
FENAR L: (428.63kB)
|
| Spanish |
FENAR L: (427.10kB)
|
| Czech |
FENAR L: (461.74kB)
|
| Japanese |
FENAR L: (824.41kB)
|
| Simplified Chinese |
FENAR L: (916.38kB)
|
TECHNICAL DOCUMENTS
| Tech Specs Table | |
|---|---|
| English |
(55.04kB)
|
| Italian |
(55.32kB)
|
| German |
(57.33kB)
|


