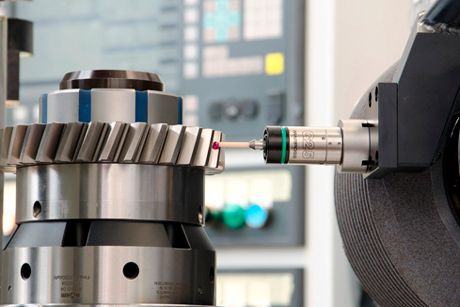
Marposs presents for the first time on the American Market the G25 gaging probe, which makes the double touch/measuring function at high speed, a reality.
G25 raises the standards of process control, opening to new opportunities.
Time saving and money saving are the new must.
Although the G25 device resembles a touch probe, it is actually a gauge with the ability to do both part surface scanning and perform touch functions for part positioning and measurement.
The compact G25 device was developed to gauge parts while still fixtured in the machine in case reworking is required. When used for gear grinding, the G25 gauge identifies the part location and tooth spacing for purposes of aligning the part with the grinding wheel prior to grinding. The same device is then used to scan the profile of the finished part in a continuous cycle.
Read more information on the press release.